Pages

Saturday, October 26

Natural Curly Hair Routine

http://hairdr13,blogspot.com | KitchenKurls | Natural Curly Hair Routine

...

I am very low maintenance A.K.A lazy when it comes to doing my own hair. I've always liked to do other peoples hair instead of my own. I am a self proclaimed product junkie and deciding on what to use and when was a struggle. I am currently 90% natural with some longer relaxed pieces throughout my bang area. My ultimate goal is waist length 3B/C curly hair. I do remember my hair before relaxers and I can't wait to have my curls back. It usually only takes me a few steps to get beautiful defined curls which is less time than it took me to maintain my relaxed hair daily!

Product Junkie Help!
Experimenting with new products while transitioning or being a newly 100% natural female can get pricey with the trial and error that comes along with it. I shop at my local beauty supply store along with Sally Beauty Supply for products to put in my own hair. I see an ocean of products by different people like Shea Moisture, Motions, Cantu Shea Butter, As I Am, and SoftSheen-Carson. All of them vary in price and every one's hair is different. What works for someone else may not work for you. I had to get a reality check when it came to buying products. I found a forum and a website called Swapsack where product junkies like me can swap or sell our gently used/new products for things we haven't tried before or even old favorites. 

My transitioning routine is different from my natural routine and I still use similar products. But I've simplified the process to make my life easier and to give my wallet a break. I have 3B (sharpie sized ringlet curls) hair with a crown filled with 3C dense (tightly wound pencil sized ringlet) curls.

Natural Hair Routine

...

  • My first challenge was the fact that I sleep like a wild animal at night and I've always had an issue with things staying on my hair like satin bonnets and scarves. I even tried a satin pillow case and the only way the bonnet would stay on is when I've done a twist out or my hair is a few days old and is more voluminous. Bobby pinning the bonnet down didn't seem to work either!
  • My second challenge was dryness which is common with my hair texture. When I went to bed I had to figure out how to get my hair to stay moisturized without going to bed with wet hair.
  • My third challenge was keeping my hair stretched and my curls intact. I went back to old faithful YouTube and looked around to stumble across the pineapple method and other awesome ways to stretch your hair. Ill be posting a separate blog on stretching curly hair soon!
  • I also had a challenge in the morning to get rid of the flatness and the frizziness caused by my crazy nights sleep. Without the bonnet it sticks out every which way and gets tangled and with it my hair is sometimes flattened to my scalp or stuck in the shape of how I put it up.

...

  • If I have a lot of product build up on my scalp for example flaking or an itchy scalp I will shampoo my hair. I'm only shampooing my hair until I finish off my current shampoo bottle which is Mixed Silks Shampoo. After the bottle is done I will move more towards the Curly Girl or CG method of never using shampoo on my hair but instead use a cleansing conditioner.
  • If I am using a shampoo containing sulfates then I will put a pre-poo in my hair which you can learn more about in my Pre-Poo post. My current shampoo does include sulfates.
  • If I am washing my hair after a twist out then I will detangle my hair before getting it wet in the shower.
  • If I have someone around to help I prefer my sink to wash my hair in.
  • I only shampoo my hair 2 times a month or once every 10-14 days. Once I'm done with my current shampoo I'll no longer use shampoo on my hair.
  • I only condition or co-wash my hair 1-2 times a week.
  • I use a deep conditioner once a week.
  • I do a protein treatment twice a month because if you over use proteins it can have the opposite effect on your hair and harden your hair strands causing breakage.
http://hairdr13,blogspot.com | KitchenKurls | Natural Curly Hair Routine

Shower Routine:  Co-washing

...

http://hairdr13,blogspot.com | KitchenKurls | Natural Curly Hair Routine
  1. Section: I part my hair in half and finger comb before I put it into pigtails. I will pre-poo before getting in the shower if I want to wash my hair with shampoo.    
  2. Saturate: I get into the shower and wet my hair still in the pigtails.
  3. Shampoo (optional): You could loosen the hair tie and apply shampoo to the scalp only scrubbing and massaging for a few minutes, then rinse. Try to keep the shampoo on your hair for a short period of time.
    • By massaging the product in you increase circulation thus increasing blood flow causing a better chance of hair growth.
    • You DO NOT need to put shampoo on your ends because as you rinse the shampoo from your scalp it will run through your hair cleaning as it goes.
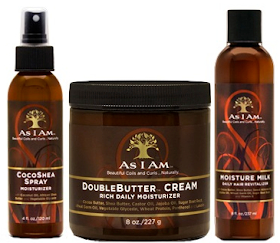
  4. Co-wash: I take one pigtail at a time down and add my cleansing conditioner which is As I Am Coconut Co-wash to my scalp then work it down through my ends adding more as needed. I finger comb to distribute the product and detangle at the same time. It smells great and really makes my curls come alive. 
    http://hairdr13,blogspot.com | KitchenKurls | Natural Curly Hair Routine
  5. Wait: I leave the conditioner on my hair as long as I can anywhere from 3-10 minutes.
  6. Detangle: I detangle with a wide tooth shower comb working my way up from my ends.                                                       http://hairdr13,blogspot.com | KitchenKurls | Natural Curly Hair Routine
    • By finger combing the hair first you'll see a lot less shed hair in this step.
    • Only detangle with product in your hair and only use wide tooth combs or your hands to reduce breakage. Tension = Breakage
  7. Rinse: I rinse out the conditioner using cool/lukewarm not cold water to seal the moisture in. When your hair is warmed the cuticle(outermost layer of hair) is lifted or open allowing water and product to flow in and out like a 2 lane highway. When you rinse conditioner out with warm water all the moisture, natural oils, and nutrients go down the drain with it. By shocking your hair essentially with cool water it shuts the hairs cuticle down locking in the moisture.
  8. Drying: I will ring all of my hair out several times before putting it in a ponytail wet. I ring it out in the ponytail one last time before I wrap my hair up in a towel.
    • Try using a terry cloth towel or a t-shirt to absorb the most amount of moisture out of your hair. If I'm doing a wash and go I would skip this step to avoid frizziness.
http://hairdr13,blogspot.com | KitchenKurls | Natural Curly Hair Routine

Styling Routine

...

*** After washing my hair I have a wet clean canvas to fill back up with product. My hair sucks up moisture like a sponge. To hold that moisture in my hair I use the LOC Method: Liquid, Oil, Cream. I apply products with those characteristics in that order. You can learn more about my LOC Method in my Transitioning Hair Regimen PostI let my hair air dry to 50% before applying any products... Your hair is filled with water when you get out of the shower. Because of the water there is no more room in your hair for the products. The products could just sit on top of your hair or slide right off and down the drain. 
  1. I part my freshly washed hair into 4 sections and clip them out of the way. I start with my back right section of hair.
  2. I already have the Liquid component in my hair which is water from my shower so I move on to my Oil product. I use a mixture of tea tree oil, coconut oil, and olive oil on my own hair. I put a nickel sized amount in my palm and warm it with my hands. I work the oil from my ends to my roots rubbing it into my scalp on all 4 sections. It will help my hair stay frizz free, shiny, and moisturized.
  3. I finger comb through my hair to detangle and wash my hands to remove all traces of oil.
  4. I move on to my cream component and work it from my ends to my roots assuring I get the most product on the oldest and most fragile part of my hair first. I finger comb and apply the product in a downward motion to distribute product evenly and lay the cuticle back down. 
  5. I take my favorite detangling tool which is my hot pink tangle teezer and I go through each section and brush from the ends up to reduce breakage from unnecessary stress and tension on the hair.
    • The smaller the section the easier it will be to comb or brush through. 
    • I don't recommend brushing wet hair with anything but a Denman brush or a tangle teezer. Your fingers and wide tooth combs are okay when the hair is wet also.
    • When detangling always start at the ends first. By doing so your removing a road block(dead tangled hair) from the end of a road(your hair strand) so that other cars(tangles) can pass through safely without a pile up(breakage).
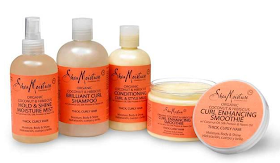
  6. I'll wash my hands and proceed to style it in whatever fashion my heart desires for the day. Sometimes a styling aid is needed to control frizz, add shine, or add moisture. I love Shea Moisture Curl Enhancing Smoothie.
http://hairdr13,blogspot.com | KitchenKurls | Natural Curly Hair Routine

http://hairdr13,blogspot.com | KitchenKurls | Natural Curly Hair Routine

At Night

...

At night things can be simple or extensive. If I have a dry style in that I can wear for several days I will maintain it to reduce frizz so it will last for instance re-twisting a twist out. With dry styles I can usually just pop the bonnet on and call it a night by using the pineapple method.
  1. I will use the pineapple method to pull my hair into a high ponytail as close to my forehead as I can get it when my hair is long enough to reach. This is to stretch the curls in the back adding more length the next day to your hair. For now I pull my hair into two ponytails. One at my crown and the other at my forehead.
    • Don't tie the elastic/scrunchie to tightly around your hair or you'll have a line in the hair and cause breakage. I see some women use headbands wrapped around twice to eliminate stress.
  2. I throw my satin bonnet on and I'm set for bed.
    • Lay your edges down before bed instead of in the morning. Apply your gel or edge control and tie a silk scarf around them as tightly as you can stand it. Throw your bonnet over it and your set for the next day. I see a big difference in my edges when I do this.
    • If you cant get your satin bonnet to stay on like me an alternative is a satin pillowcase. I got mine really cheap at my local sally beauty supply.
http://hairdr13,blogspot.com | KitchenKurls | Natural Curly Hair Routine
Satin Pillowcases
In The Morning

...

  1. I take my bonnet off and let my hair down. Depending on my style from the day before I can either refresh what I have or I enjoy wearing my natural texture which I prefer.
  2. I part it back in half again and clip one half out of the way for control.
  3. I get my hands wet and run them through my hair detangling as I go.
  4. I put a small amount of gel in my hair in a downward motion called shingling sliding the section of hair between my palms to distribute the gel. I go through with a scrunching motion to reveal the curl and use my tangle teezer for the stubborn straight ends by sliding it through my hair slowly using slight tension and shaking it back and forth once I get to the ends to reveal my curl pattern.
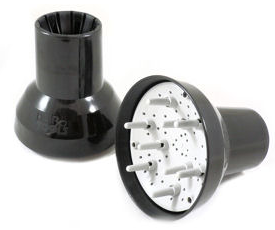
  5. If I have time I'll let it air dry or I diffuse my hair upside down with a blow dryer to set my curls with volume which you can learn about in my how to diffuse blog post.
  6. I style my hair and add finishing details with accessories or braids/twists.
  7. If I haven't taken care of my edges the night before I apply gel to my hairline and tie a silk scarf as tightly as I can around my hair. I leave it on for 20-30 minutes or as long as possible to assure that my edges are dry.
  8. Right before I leave the house I spritz my hair with a light hold hairspray for all day control. This step isn't always necessary but I live in Florida and some days the humidity gets ridiculous.
    • Hairspray is full of alcohol which can be drying to curly or natural hair. Check the ingredient label and don't overuse the product as some hairsprays can break your hair off after prolonged regular use.
http://hairdr13,blogspot.com | KitchenKurls | Natural Curly Hair Routine

http://hairdr13,blogspot.com | KitchenKurls | Natural Curly Hair Routine

Refreshing My Curls

...

So say I've been extra low maintenance and I haven't been following my night time routine as often... Well then when I wake up the next morning I have a hot mess of flattened frizzy curls to fix. I don't always want to get in the shower and start all over and I refuse to use dry shampoo. My only option is to refresh my curls.
  1. I attempt to remove the elastic that is buried in my hair.
  2. I separate my hair the best I can into 4 sections and clip them out of the way.
  3. I get a water bottle and I halfway fill it with bottled water because I have well water. I add my Simply U Moisturizing Conditioner and Kinky Curly Knot today to it and shake well. 
  4. I squirt this mixture lightly onto each section and run my hands through it.
  5. I add Oil and cream to the ends working my way up to seal in moisture and smooth my frizz.
  6. I then scrunch/shingle Eco Styler Argon Oil Gel into my hair for all day hold and frizz control.
  7. I either diffuse my curls or let my hair air dry and style as usual.
http://hairdr13,blogspot.com | KitchenKurls | Natural Curly Hair Routinehttp://hairdr13,blogspot.com | KitchenKurls | Natural Curly Hair Routine

http://hairdr13,blogspot.com | KitchenKurls | Natural Curly Hair Routine

E.A.S.E

...

The E.A.S.E method is a great method for getting moisture to every part of your hair. It goes along with my LOC method of applying hair products. I explained the L.O.C method in my Transitioning Hair Regimen post. This is how I apply product to my hair and the LOC method is what products I apply to my hair. The E.A.S.E method explains what areas of your hair to moisturize when. I only use both methods on hair that is 2 or more days old and I've seen a big difference in my hair since combining both methods.
  • Edges... Dampen your hairline with any liquidy product followed by the oil of our choice and the styling cream. Do this by sweeping hair back away from your face not in circular motions to avoid knots and tangles.
  • All Over... I apply the liquid again lightly all over the outside of my hair finger combing back into a ponytail with my hands to control it.
  • Section... Section the hair into 2-6 sections depending on texture and density(thickness). I apply my liquid to each section and finger comb to detangle. I clip each section out of the way when I'm done.
  • Ends... Keep your hair in the sections or further divide into more sections and apply the oil of your choice to your ends working your way up. This will seal in the moisture you just spent time putting in your hair. Some popular oil options are extra virgin olive oil, coconut oil, and Castor oil.
  • Afterward depending on the occasion if a styling aid is needed I'll add a cream working my way from ends to roots like Cantu Shea Butter Leave-In.
http://hairdr13,blogspot.com | KitchenKurls | Natural Curly Hair Routine

I got the E.A.S.E method from the Trendy Socialite on YouTube! Go check her out and let me know what you think in the comment box below. Thanks for visiting my blog!

~"Your hair is the ball gown that you never take off."~ 
-Jo Robertson 

Also Check Out...

Friday, October 4

Beauty Benefits Of Coconut Oil


KitchenKurls | Http://hairdr13.blogspot.com | Beauty Benefits Of Coconut Oil

I love DIY hair treatments made from quality ingredients you can find in any pantry. Coconut oil by far is my favorite oil and it has a ton of great uses and benefits. I try to use it as often as I can in as many different ways possible.

What is Coconut Oil...?

  1. Coconut oil is extracted from the meat/kernel of coconuts. 
  2. The oil is antimicrobial making it easy for the body and skin to absorb the oil better than any other oil. 
  3. It is a emollient which makes the skin softer and plumper because it helps the skin absorb beneficial nutrients easily. 
  4. I also love coconut oil because its a natural humectant drawing in moisture to your skin. 
  5. At room temperature the oil is a solid but will become a liquid at 76 degrees or higher. 
  6. Organic coconut oil is 90% saturated fat but its fatty acids are different than other oils. It contains MCT (Medium Chain Triglycerides) which your body metabolizes faster. It will make you feel full quicker helping in weight loss

What Kind Should I Buy...?

Don't Buy: Refined Coconut Oil-
  • Can be used at a higher temperature (cooking).
  • No color
  • Low odor
  • Can be hydrogenated (yucky trans fat)
  • Refined using a chemical distillation process which can effect the oil badly.

Buy: Unrefined Coconut Oil-
  • Other names include: Organic, Virgin, Cold Pressed or Extra-Virgin
  • Strong flavor
  • Strong smell
  • Made from fresh coconut!
  • No additives
  • More expensive $$$
  • Has not been processed :)
~ When companies process oil they use heat and most oils will become toxic and expired at high temperatures. When you open your oil it could already be expired but not coconut oil which can withstand high heat without becoming toxic. Most other oils and moisturizers have mineral oil as the main ingredient. These products coat your hair instead of penetrating it. All it does is give the illusion of moisture and shine. ~

~ Water based products can penetrate relaxed or heat damaged hair and cause the hair strand to swell and break. When you replace these ingredients with coconut oil the hair strands will absorb and hold onto the moisture the coconut adds. ~

Coconut Oil Contains...
  1. Antioxidants- Protects you against free radicals.
  2. Medium Chain Triglycerides- Metabolize faster aiding in weight loss.
  3. Caprylic Acid
  4. Lauric Acid
  5. Capric Acid
  6. Vitamin E- Antioxidant
KitchenKurls | Http://hairdr13.blogspot.com | Beauty Benefits Of Coconut Oil

Why Use Coconut Oil...?

Medical Benefits

  • The smell removes stress and mental fatigue like migraines. It will also help those suffering from depression.
  • Great for weight loss because the fatty acids destroy the over growth of yeast, it speeds up your metabolism, and it prevents the craving for carbs. 
  • The saturated fats contain antibacterial, anti-viral, anti-fungal, and anti-parasitic properties.
  • It boosts your immune system and treats all types of infections better than some medications can. It will kill the viruses that cause influenza, herpes, measles, hepatitis C, SARS, & AIDS.
  • It helps your digestive system become more regular because the MCT (Medium-Chain Triglycerides) are small and easy to digest.
  • Improves insulin sensitivity and glucose tolerance to regulate blood sugar. It will also prevent diabetes if used as a regular part of your diet.
  • It promotes good heart health and can prevent heart attack and stroke in the long term.
  • Has no negative effect on cholesterol and will help to reduce bad cholesterol levels from the lauric acid it contains.
  • Is a natural antioxidant and great for anti-inflammatory.
  • Can and will help soothe or cure many skin problems: 
    • Dry Skin- Moisturizes and soothes dry cracked skin.
    • Rashes- Reduces inflammation and redness naturally.
    • Herpes- Kills the virus and gets rid of cold sores.
    • Acne- Can be used to wash the face or applied as a moisturizer to keep pores clean and clear.
    • Cellulite- Stimulates blood flow and can reduce cellulite pockets when used regularly in your diet.
    • Eczema- Will alleviate itchiness and add moisture to the skin as well as reduce redness and any irritation.
    • Stretch Marks- Stimulates new skin cell growth and can be used during pregnancy to reduce stretch marks.
    • Dermatitis- Encourages fast healing and gets rid of the itchiness.
    • Sunburn- Can soothe and reduce any inflammation/redness and moisturize the skin to reduce peeling skin.
    • Psoriasis- Helps moisturize dry skin patches.
    • Burns- Will put a protective barrier over the skin while allowing it to breath and heal from the inside out.
    • Cuts & Scrapes- Can reduce the chance of  irritation and infection because it fights bacteria.
    • Varicose Veins- Will help circulation and relieve pressure when massages into the area.
    • Warts- Keeps them from growing larger.
    • Soothes New Tattoo's
    • Chicken Pox- Will help the itchiness and reduce scarring.
    • Shingles- Will cure the itchiness and redness quickly and soothe the burning.
    • Bee Stings/Bug Bites- Helps the swelling and irritation go down.
    • Genital Warts- When taken internally and topically.
  • Head Lice- Suffocates the bugs on the scalp.
  • Great for getting rid of fungus on the feet and nails. It will get rid of athletes foot as well.
  • Helps acid reflux and indigestion problems.
  • Will alleviate some allergies.
  • Will help those with asthma including children.
  • Will help prevent or alleviate symptoms from serious diseases: 
    • Cancer
    • Crohns
    • Cystic Fibrosis
    • Gallbladder Disease
    • Hemorrhoids 
    • Heart Disease
    • HIV
    • Diabetes
    • Hyperthyroidism
    • Irritable Bowel Syndrome & Constipation
    • Kidney Disease
    • Liver Disease
    • Osteoporosis
    • Alzheimer's/Dementia- Provides the brain with the necessary keetones to improve function.
    • Autism
    • Depression
    • Ulcerative Colitis
    • Under-active Thyroid Gland
    • Thyroid Function- Stimulates the metabolism increasing energy.
    • Scurvy
    • Rickets
    • Piles
    • Pancreatitis
    • Mononucleosis
    • Lung Disease
    • Kidney Stones
    • Jaundice
    • Hemorrhoids
    • Epilepsy
    • Dysentery
    • Stomach Ulcers
    • Urinary Tract Infections
    • Candida Albicans- Caprylic acid targets harmful bacteria and kills off excess candida.
    • Pink Eye
    • Adrenal Fatigue
    • H. Pylori
  • Gives you an instant energy boost because your body uses it as energy instead of storing it as fat.
  • Kills the bacteria in your mouth to prevent...
    • Tooth Decay
    • Thrush
    • Throat Infections
    • Gum Disease
    • Cavities
  • Great for menstrual cramps/dryness and discomfort as well as relieving yeast infections.
  • Will reduce or alleviate fevers.
  • Increases blood flow and circulation for faster healing.
  • Supports tissue healing and repair.
  • Improves magnesium and calcium absorption.
  • Supports the development of strong teeth and bones.
  • Will soothe ear infections
  • Will help relieve your little ones diaper rash and cradle cap if applied topically right after bath time.
  • Alleviates back pain and sore muscles when massaged into the skin.
  • It will leave a chemical barrier on the skin protecting it against the chemical in pools, sunburn, and insect bites.

Beauty Benefits

Coconut oil has a lower molecular weight which are composed in a linear chain allowing it to penetrate the hair shaft easily. It reduces protein loss in hair and can cure just about any hair ailment.
  • Eliminates and prevents dandruff.
  • The fatty acids deeply condition the hair from the cortex(center).
  • Provides protein to the hair shaft keeping weakened hair from breaking off.
  • Helps stimulate hair growth and retain length.
  • Removes tangles from hair and moisturizes dry brittle ends to prevent breakage and split ends.
  • Protects the body from free radicals that promote premature aging.
  • Softens the skin leaving it looking and smelling good.
  • Cures acne and shrinks pores by fighting off bacteria.
  • Softens dry cracked lips.
  • Soften dry skin around the nail bed.
  • Strengthen nails.
  • Great tanning lotion with a natural SPF to prevent sun burn.
  • Conditions, cleanses, and separates eye lashes.
  • Prevents wrinkles and fades age spots.
  • Helps prevent sagging skin.
  • Tames frizz- Warm coconut oil in your hands and smooth over fly-away's.
  • Softens feet and cures cracked heels- Massage into the skin after a warm bath or shower.
  • Repairs damaged, dry, brittle hair.
  • Will remove gum from hair!
  • Makes hair shiny and soft.
  • Alleviates a dry itchy scalp- Dandruff, Seborrheic Dermatitis, or Psoriasis.
  • Draws and seals in moisture.
Replace Common Hair Products... Use organic warmed coconut oil to replace any of your hair products.

  • Deep Conditioner- Massage into damp hair and leave in up to 1 hour then rinse normally.
  • Leave In Conditioner- Apply a small amount to clean sectioned hair and comb through.
  • Moisturizer- Use as a everyday all over moisturizer in small amounts for lasting shine.
  • Detangler- Mix with water and spray on instead then comb through to distribute and detangle.
  • Split End Mender- Concentrate warm coconut oil on the ends of your hair to reduce breakage.
  • Pre-Poo- Prevent shampoo from stripping essential oils from your hair with coconut oil as a protective barrier.
KitchenKurls | Http://hairdr13.blogspot.com | Beauty Benefits Of Coconut Oil

<a data-pin-do="embedPin" href="http://www.pinterest.com/pin/233131718184205233/"></a>

Add Coconut Oil To Your Life


KitchenKurls | Http://hairdr13.blogspot.com | Beauty Benefits Of Coconut Oil

Moisturizer... Coconut oil makes a great all over moisturizer. You can warm it in your hands and rub it into your skin or follow the recipe below and place the fluff in a jar or container.
  • 1 C. Coconut Oil
  • 1/4 C. Olive Oil
  • 1/4 C. Shea Butter
  • 1/2 C. Distilled Water
  • 1/2 C. Beeswax (pellets, shredded, pastilles)
  • 1 Tb. Avocado Oil
  • 1 Tb. Vitamin E Oil (Vitamin D)
  • 5-10 Drops Lavender Essential Oil (Vanilla, Chamomile, Lemon)
  1. Over medium- low heat combine coconut oil, Shea butter, and beeswax until softened.
  2. Add in your olive oil, water, and avocado oil stirring often until melted.
  3. Immediately pour the mixture into a bowl and beat with a electric mixer for a few minutes adding in your vitamin E and essential oils.
  4. Refrigerate for 5 minutes and remove.
  5. Beat the mixture again for 3-4 minutes until congealed and creamy.
  6. Place your mixture in a mason jar or a small open container and enjoy!

KitchenKurls | Http://hairdr13.blogspot.com | Beauty Benefits Of Coconut Oil

Deodorant... A great natural homemade deodorant to beat the heat.
  • 1/4 C. Baking Soda
  • 1/4 C. Cornstarch or Arrowroot 
  • 4-6 Tb. Coconut Oil
  • 2 Tb. Shea Butter
  • 1 Tsp./15 Drops Rose Essential Oils (Eucalyptus, Lavender, Chamomile)
  • 1 Tsp. Rosewater (optional)
  1. Boil 2 cups water and remove from the heat. 
  2. Place a metal mixing bowl over the opening of the pot to create a double boiler.
  3. Add the coconut oil and Shea butter together in the bowl with a whisk until barely melted.
  4. Whisk in the baking soda, arrowroot/cornstarch, and rosewater.
  5. Remove from the heat source and let cool slightly
  6. Add your choice of essential oils for a great smell.
***Pour into a a large jar or sealed container for storage and melt the mixture in your hands to use.
***You can also pour it into an old deodorant stick and smooth the top (may melt in the summer).
***Keep in a cool dry place below 76 degrees to avoid a runny mess.

KitchenKurls | Http://hairdr13.blogspot.com | Beauty Benefits Of Coconut Oil

Shampoo... Forget sulfates and expensive store bought products. Why you should avoid sulfates ...CLICK HERE...
  • 1/3 C. Almond Liquid Castile Soap (Dr. Bronners)
  • 1/2 C. Coconut Milk
  • 2 Tb. Coconut Oil
  • 2 Tsp. Tea Tree Oil (Vitamin E, Almond, Olive) 
  • 5-10 Drops Almond Essential Oil (Lavender, Lemon, or Vanilla)
  1. Melt coconut oil in a microwave safe bowl.
  2. Combine the ingredients in a squeeze bottle or jar.
  3. Shake well to mix.
*** You can get a squeeze bottle at a dollar store.
*** Only keep the mixture in your shower for a month at a time.
*** Shake before each use.
*** Only use a small amount.
KitchenKurls | Http://hairdr13.blogspot.com | Beauty Benefits Of Coconut Oil

KitchenKurls | Http://hairdr13.blogspot.com | Beauty Benefits Of Coconut Oil

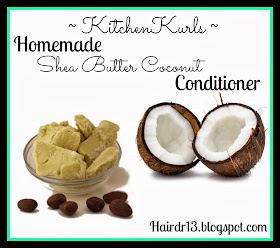
Conditioner... This can also be used as a hair mask. Apply all over and let sit for up to 1 hour. Rinse with cool water to seal in moisture and towel dry with a microfiber towel or use a cotton t-shirt to reduce frizz.
  • 1 C. Coconut Oil
  • 1 C. Shea Butter
  • 1/2 C. Coconut Milk
  • 3 Tb. Moroccan Argan Oil (Olive Oil, Tea Tree, Vitamin E)
  • 2 Tb. Essential Oil (Vanilla, Lavender, Citrus)
  1. Add coconut oil and Shea butter together in a microwave safe bowl.
  2. Microwave for up to 30 seconds and whisk to combine.
  3. Add the coconut milk, oil of your choice, and your favorite essential oils.
  4. Let it cool and pour the mixture into a large mouth jar.
KitchenKurls | Http://hairdr13.blogspot.com | Beauty Benefits Of Coconut Oil
Or you can try a store bought cleansing conditioner.

KitchenKurls | Http://hairdr13.blogspot.com | Beauty Benefits Of Coconut Oil

Hair Gel...
  • 2 C. Aloe Vera Gel
  • 1 C. Coconut Oil
  • 2 Tb. Vitamin E
  1. Warm the coconut oil for 10 seconds to slightly melt it in the microwave.
  2. Add the coconut oil and vitamin E to the aloe vera gel in a large bowl.
  3. Mix well until incorporated and pour into a squeeze bottle.
KitchenKurls | Http://hairdr13.blogspot.com | Beauty Benefits Of Coconut Oil

KitchenKurls | Http://hairdr13.blogspot.com | Beauty Benefits Of Coconut Oil

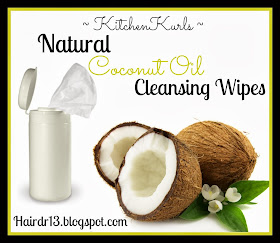
Make-Up Remover Wipes... Coconut can be applied directly to the eye lids and will not burn if it gets into your eyes. But another way to remove your makeup with it is to turn it into wipes.

KitchenKurls | Http://hairdr13.blogspot.com | Beauty Benefits Of Coconut Oil

  • Select A Size Bounty Paper Towels (Viva is also soft)
  • 2 Tb. Coconut Oil (Liquefied)
  • 2 Pumps Liquid Castile Soap (Dr. Bronners)
  • 4 C. Warm Distilled/Purified Water
  • 2 Large Containers w/ Lid
  1. Mix water, coconut oil, and soap into a large bowl. Pour half of the liquid about 2 cups into each container.
  2. Place halved paper towel rolls (cut the roll in half horizontally) into separate containers with the liquid.
  3. Let soak for 30 minutes.
  4. Remove the cardboard roll from the center. Don't try to do this while the paper towels are dry because it makes a mess.
  5. Turn container upside down and let soak another 30 minutes.
  6. Remove excess liquid from container.
  7. Pull the center of the paper towel up for easy use.
***Use distilled or purified water in this recipe to avoid the towels growing mold and expiring quickly.

KitchenKurls | Http://hairdr13.blogspot.com | Beauty Benefits Of Coconut Oil
Lip Balm... Colored lip balms can get expensive. Try making your own one from scratch without Vaseline!
  • 1 Tsp. Broken Colored Blush/Eye Shadow (color is up to you) 
  • 1 Tsp. Cocoa Powder (optional to darken shade)
  • 4 Tb. Coconut Oil
  • 2 Tb. Jojoba/Almond Oil
  • 2 Tb. Beeswax Pastilles/Grated (optional)
  • 2 Tb. Honey
  • 5 Drops Vitamin E Oil/2 Punctured Capsules
  • 7 Drops Vanilla Essential Oil (Rosemary, Lavender, Orange)
  1. Warm oils, beeswax, and honey.
    1. You can microwave it for up to 30 seconds.
    2. You can use a double boiler by putting a heat resistant bowl over boiling water.
    3. You can heat in a medium saucepan over low heat stirring often.
  2. Stir until ingredients are melted.
  3. Remove from the heat and whisk in the cocoa powder, color, vitamin e, and essential oils.
  4. Place the bowl in a pan of ice water to cool it rapidly.
  5. As it cools, quickly whisk in your honey until incorporated.
  6. Place into a small jar/tin quickly like an old concealer container/mini Altoids.
  7. Let set up for 3 hours or refrigerate to solidify.
KitchenKurls | Http://hairdr13.blogspot.com | Beauty Benefits Of Coconut Oil


KitchenKurls | Http://hairdr13.blogspot.com | Beauty Benefits Of Coconut Oil

Face Mask...
  • 1 Tb. Honey
  • 1 1/2 Tb. Coconut Oil
  • 1/2 Ripe Avocado
  1. Barely melt the honey and coconut oil for 10 seconds in a microwave safe bowl.
  2. Mash the avocado into the bowl with a fork and mix well.
  3. Wash your face with warm water and apply the mask.
  4. Let it sit for up to 20 minutes until dried.
  5. Rinse and pat dry.
KitchenKurls | Http://hairdr13.blogspot.com | Beauty Benefits Of Coconut Oil

Shaving Cream... Enjoy this fluffy Citrus Shaving Cream anytime you need a pick me up or a you have a hot date for soft, shiny legs.
  • 1/2 C. Shea Butter
  • 1/2 C. Coconut Oil
  • 1/4 C. Baby Oil (optional)
  • 1 C. Sugar (White, Brown, or mixed)
  • 1/4 C. Jojoba Oil (Almond, Moroccan Argan, Vitamin E)
  • 3 Tb. Citrus Juice (Lime/Lemon) 
  • 10-20 Drops Vanilla Essential Oil
  • 3-5 drops Orange Essential Oil
  1. Over low heat combine the Shea butter and the coconut oil into a medium saucepan.
  2. Stir the mixture until melted and incorporated.
  3. Transfer the mixture into a microwave or heat safe container.
  4. Stir in the sugar, jojoba oil, baby oil, citrus juice, and the essential oils then refrigerate until hardened.
  5. Whip the cream with a mixer or hand beater for a light and fluffy consistency.
  6. Place your whipped shave cream into a jar with a lid and store in a cool, dry place.
***Makes up to 8 oz.

KitchenKurls | Http://hairdr13.blogspot.com | Beauty Benefits Of Coconut Oil
Exfoliation Body Mitt
Microdermal Exfoliation Mitt


KitchenKurls | Http://hairdr13.blogspot.com | Beauty Benefits Of Coconut Oil


Hair Mask... Your hair will be shiny, soft, and smell great.
  • 4 Tb. Pure Maple Syrup
  • 1 Tb. Honey (natural humectant to add moisture)
  • 3 Tb. Coconut Oil
  • 2 Tb. Olive Oil
  • 1 Tb. Tea Tree Oil (optional for a dry/itchy scalp)
  1. Warm the maple syrup and the honey in the microwave for 15 seconds.
  2. Mix in your oils until melted and incorporated.
  3. Apply to clean damp hair and comb through to distribute.
  4. Put your hair up into a shower cap or saran wrap for 20-60 minutes. 
  5. Rinse with warm water and continue to condition hair normally.
***You shouldn't need to shampoo again but you can if you feel you are unable to get all of the mask out of your hair.

Other Uses...
  • Anti- Wrinkle Eye Cream- Mix some into your favorite face cream or use alone.
  • Pre-shave/Aftershave- Rub into the skin for soft shiny legs.
  • Stretch Mark Cream- After a warm shower rub warmed coconut oil into the area using a bath brush or exfoliation mitt.
  • Cuticle Oil- Rub small amounts into your cuticle bed and the skin surrounding your nails.
  • Bath Oil- Add coconut oil to your warm bath water and it will melt into the water.
  • Personal Lubricant
  • Shoe Polish- Buff on and wipe off for a lasting shine.
  • Foot Cream- For dry cracked heals massage into skin after a warm shower.
  • Tattoo Cream- After the tattoo peels it will keep the skin moisturized.
  • Facial Cleanser- Baking soda + Coconut oil = Clean healthy skin
  • Massage Oil- Massage warmed oil into the skin after a shower or add essential oil to coconut oil and keep in a sealed container.

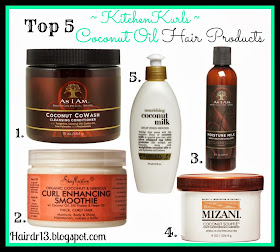
    Great Product Lines Containing Coconut Oil

    ...
      KitchenKurls | Http://hairdr13.blogspot.com | Beauty Benefits Of Coconut Oil

      Organix Coconut Oil
      KitchenKurls | Http://hairdr13.blogspot.com | Beauty Benefits Of Coconut Oil
      KitchenKurls | Http://hairdr13.blogspot.com | Beauty Benefits Of Coconut Oil


      KitchenKurls | Http://hairdr13.blogspot.com | Beauty Benefits Of Coconut Oil
      The "Monoi Oil" is made from a mixture of coconut oil and flowers.
      Carols Daughter | Monoi Oil Collection

      KitchenKurls | Http://hairdr13.blogspot.com | Beauty Benefits Of Coconut Oil

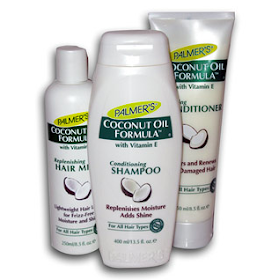
      Palmers Coconut Oil

      ~ Doing what you like is freedom. Liking what you do is happiness. ~

      Check Out Other Great Blogs...

      Affordable Hair Products
      How To: Bouncy Shiny Curls
      Fix Split Ends

      Tuesday, June 25

      Drug Store Hair Care

      http://hairdr13.blogspot.com | KitchenKurls | Drug Store Hair Care

      ...
      If you ask any hair stylist what "cheap" or drug store level hair products they would recommend they will most likely tell you none. Drug store level hair products may not be as good as higher end salon quality products but they get pretty close. I chose my favorite hair care lines from the most common retailers nationwide.

      I am transitioning my hair from relaxed to natural and finding hair care lines that work for me has been a challenge. No one wants to spend tons of money on a product that might not work. My 10 favorite curly hair lines are not in any order but for more information just click the name and follow the link.
      1. Shea Moisture
      2. Miss Jessies
      3. Carols Daughter
      4. Kinky Curly
      5. Mixed Chicks
      6. Organix
      7. Jane Carter
      8. As I Am
      9. Curls Unleashed
      10. Ouidad
      Http://hairdr13.blogspot.com | KitchenKurls | Drug Store Hair Care

      Wal-Mart... The biggest and baddest retailer nationwide would have to be Wal-Mart. Where ever you go you will find one. They have expanded their hair care isle in the last few years and I get a ton of my products from them because you can't beat their competitive pricing.

      Higher End:
      • CHI
      • Giovanni
      • Nexxus
      • Matrix
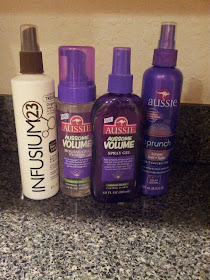
      • Infusium

      Lower End:
      • Tresemme
      • Aussie
      • Organix
      • Paul Mitchel
      • John Frieda
      KitchenKurls | Drug Store Hair Care | Http://hairdr13.blogspot.com

      The Worst!
      • Vo5
      • Suave
      • Pantene
      • Herbal Essences
      • Head and Shoulders
      KitchenKurls | Drug Store Hair Care | Http://hairdr13.blogspot.com


      Walgreen's... Walgreen's has more options than Wal-Mart for black or natural hair care but their prices are a tad bit higher. One thing I love about Walgreen's are their frequent clearance sales and its not uncommon to get Shea Moisture products for a steal.
      1. 4 Naturals
      2. Motions
      3. Africas Best
      4. Aveeno
      5. Dr. Miracles
      6. Vidal Sassoon
      7. SoftSheen-Carson
      8. Burts Bees
      9. Rusk
      10. Mizani
      KitchenKurls | Drug Store Hair Care | Http://hairdr13.blogspot.com


      Target... By far Target has the largest amount of black or natural hair products of any major retailer. I feel like I'm in hair heaven when I go down the isles of Target. They do carry a heavier price tag than Wal-Mart but you get a big variety along with it.
      • Pureology
      • Bumble and Bumble 
      • Cantu
      • Biosilk
      • Twisted Sista
      • Curls
      • Fantasia
      • ItsA10
      • Macadamia
      • Clear
      • TIGI
      KitchenKurls | Drug Store Hair Care | Http://hairdr13.blogspot.com

      ...

      10 Golden Rules:

      1. Be open minded... Buying products is all about trial and error, find what works for you and pass on what doesn't. There are forums like Swapsack on Facebook that allow you to share gently used or new hair products with other people for money or something you haven't tried!
      2. Stay on budget... Don't go bankrupt trying out new products and pace yourself. Try one hair care line at a time to minimize random impulse buys. Also don't spend a fortune on hair products just because its supposed to be a better hair care line. There are so many other options available.
      3. Give it time... Try hair products out for a minimum of 30 days before you make judgement. There is an exception to this rule when your hair instantly hates the product. What doesn't work with your texture may work for someone else's.
      4. Don't get attached... Sometimes a manufacturer or retailer stops making/carrying a beloved hair product. Don't mourn for to long because there's always something else that will work just as well or something new coming on to the market.
      5. Jump off the bandwagon... In the past year there has been a huge boom in the production of natural hair products. You don't have to try out every single line and it's ok to stick to old school products you used when you were a kid. Being a naturally curly girl isn't a trend that's going away any time soon and its not something new. Every company and its uncle wants a bit of the action. I don't know why it took them so long to realize that being natural is fabulous!
      6. Less is more... Everyone's hair is different and depending on your porosity your hair may need more product than others. Start with small sections of hair and apply quarter sized amounts of product. Add more as needed to avoid waste or weighing your hair down. No one deserves lifeless curls.
      7. Avoid hoarding... It gets very hard to let go of full containers but if you don't eventually it'll look like a drug store went out of business and dropped half its inventory off on your doorstep. You don't have to throw them away and make sure you know your retailers return policy. Most of the time after a test drive you can still take hair products back within 30 days.
      8. Don't be fooled... Companies love to hide harmful things in our hair products like sulfates and silicone's which you can learn more about HERE. Things that say "Sulfate Free" may not be completely free of sulfates. Always check the ingredient list on the back of the products you want to purchase. The ingredient listed are from the largest amount to the smallest amount within the product. 
      9. Two words... FREE SAMPLES... Grab, use, and enjoy as many of them as you can get. Websites like Miss Jessies offers free samples pretty frequently so you can test drive their products before you make the big purchase.
      10. Online shopping... When you can't touch and smell a product as well as flip it over to read the ingredients I don't think its worth the gamble. Its hard to return online orders and you never know when or in what state the product will arrive to you. Only order from guaranteed websites and check their return policy before you place the order.

      KitchenKurls | Drug Store Hair Care | Http://hairdr13.blogspot.com
      FREE Samples From Miss Jessies
      KitchenKurls | Drug Store Hair Care | Http://hairdr13.blogspot.com
      Some Of My Favorite Hair Products

      ...

      If you insist on online shopping or you'd like to do some research on products here are other great natural hair care websites to buy products.

      Friday, April 19

      Transitioning Help

      Transition Like A Boss http://hairdr13.blogspot.com

      Some women grow up getting perms and relaxers and others stumble upon it later into adulthood. These chemical processes are a huge commitment and very permanent. Perms and relaxers are similar but the end result is usually curly or straightened hair. They do this by breaking the disulfide bonds found in the protein of our hair strands. These chemicals are smelly and need maintained or retouched every so often resulting in an expensive habit.

      My Background...

      KitchenKurls | Transitioning Help | http://hairdr13.blogspot.com
      KitchenKurls | Transitioning Help | http://hairdr13.blogspot.com
      Freshly washed hair.

      There comes a point in a woman's life when she wants a change. I hit that point in my first 6 weeks of hair school. I allowed my class to do a relaxer on me as a demonstration. That was the last relaxer I had. I'm almost a year into my 2 year long term transitioning process. I cant wait to cut off what's left of my relaxer.

      KitchenKurls | Transitioning Help | http://hairdr13.blogspot.com
      My hair has gotten longer and thicker over time. I had 2 inches cut off before taking the last photo.

      What It All Means...

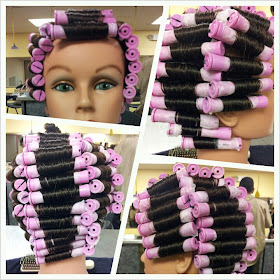
      Perm- A permanent wave is a process of adding curl to the hair using strong chemicals that break down bonds in your hair to shape your hair in its new curly form.

      The Process:
      1. Shampoo
      2. Wrap
      3. Apply Chemical
      4. Process
      5. Rinse
      6. Dry
      7. Apply Neutralizer
      8. Rinse
      9. Remove Rods
      10. Style
      KitchenKurls | Transitioning Help | http://hairdr13.blogspot.com
      Standard Perm Wrap
      KitchenKurls | Transitioning Help | http://hairdr13.blogspot.com
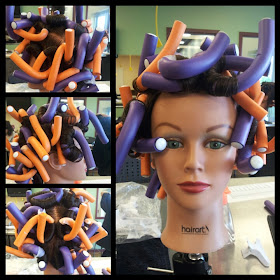
      Specialty Perm With Flexi Rods
      KitchenKurls | Transitioning Help | http://hairdr13.blogspot.com
      Partial Pigtail Spiral Perm
      Relaxer- Also known as the "Creamy Crack" or a "perm" is a creamy white chemical applied to naturally curly, coarse, or resistant hair. The purpose is to reduce tangling and create a more manageable hair texture. It achieves a straight look that needs touched up every 4-12 weeks. The hair can not be made curly again and instead must be grown out or cut off to reveal your natural texture. It can have bad effects on hair like a lack of growth due to breakage.

      Big Chop- Shortened to BC is when all of the relaxed hair is cut off at one time to reveal the natural hair beneath it. Some women shave their heads or chop it off after only a month. This can be a healthier and better option for some women. You really learn how to do your hair from its short stage. When its longer you will already know how to care for it.

      Long Term Transition- The second option is to go through a lengthy transition process. For some people chopping all of their hair off just isn't an option and I was one of them. For every inch you grow you cut an inch and so on. Chopping a little at a time instead of all at once leaves you to deal with multiple textures in your hair. It is more challenging and calls for a ton of patience but is very do-able.

      Transition Like A Boss
      ...
      How Will You Transition...?

      Braid Extensions- You can braid or twist your hair with extension hair so that you have a lower maintenance transition. I suggest medium to large braids or twists to avoid breakage and stress on the hair growing in. Some smaller braids like micros braids have been known to break off the edges of hair in the front hairline. This can lead to permanent hair loss in the area.

      KitchenKurls | Transitioning Help | http://hairdr13.blogspot.com

      KitchenKurls | Transitioning Help | http://hairdr13.blogspot.com

      Wigs/Hair Pieces- I transitioned using this method because it worked for me. You can buy different types of wigs to cover your hair or you can wear a phony pony tail. It all depends on how much coverage you are looking for. I'm a huge fan of half wigs!

      KitchenKurls | Transitioning Help | http://hairdr13.blogspot.comKitchenKurls | Transitioning Help | http://hairdr13.blogspot.com

      KitchenKurls | Transitioning Help | http://hairdr13.blogspot.comKitchenKurls | Transitioning Help | http://hairdr13.blogspot.com

      Weaves- You can braid down or place a cap/net over the natural hair to add a full sew in weave or a quick-weave. This method did not work for me because it caused a lot of breakage in my hair from the cornrows. I don't recommend using this method for your entire transitioning process because the hair is always braided so small and tightly. It can effect your hair growth over time.

      KitchenKurls | Transitioning Help | http://hairdr13.blogspot.com
      Before and after a full sew in weave. I had a to of breakage after taking it out.
      Heat- For the first few moths of transitioning heat can be an alright option. It's most likely how you have been maintaining your relaxed hair thus far so why not keep it going. I don't recommend this option past the first 4-6 months of transitioning. It can cause damage and breakage to the new curly hair that is growing in. Always remember to use a heat protectant before applying heat.

      Best Wal-Mart Heat Protectants...

      1. CHI 44 Iron Guard
      2. TRESemme Heat Tamer
      3. Nexxus Heat Protexx
      4. Organix Brazilian Keratin Therapy Flat Iron Spray
      5. Aussie Hair Insurance

      You can mix these methods or try each one to see what suites you best. You will have plenty of time to experiment through your journey. Just remember that no matter what you do you need to take care of your hair whether its underneath a wig or braided down for a weave. Don't neglect your hair just because it's out of sight. You can also transition for as long as you please and some women cut the rest of the relaxer off after about 9 months into it. Find what works for you and stick to it.

      Learn more about the options above HERE in my Hair Extension Options blog post.

      Maintenance...

      Detangling- There are key ingredients to minimizing hair loss while detangling the hair. The average person can loose up to 200 hairs a day. When the hair is in its dry state it can collect the fallen hair inside of the style. When the hair gets wet or you start to manipulate it you will start to see hair loss.

      To see a wad of hair in the brush afterward is nothing to be alarmed about because your just seeing all of your daily hair loss at one time. The only time to worry is if your seeing bald spots or losing patches/clusters of hair in one spot.
      • Section the hair before attempting to detangle it. The smaller the section the easier it will be.
      • Never comb dry hair.
      • Stay away from rat tail or cutting combs. The close together teeth will pull and rip hair easier.
      • Find a wide tooth comb and befriend it.
      • Never brush wet hair.
      • Take advantage of products by detangling the hair while it is loaded up with product.
      • Use a product with "slip" meaning a product that makes running a comb through your hair easier.
      • Detangle in the shower because the constant stream of water can make it easier.
      • Use tools that make detangling easier like a TangleTeezer.
      • Use your fingers to apply products, section your hair, and detangle your hair.
      • Expect hair loss
      Tips & Tricks
      ...
      1. Expect the unexpected... Do not go into this assuming you know everything because no matter how much you research and how many videos you watch or blogs you read you don't! Your hair will have a mind of its own. I am trained on doing hair and my hair teaches me something new every time I try to do it.
      2. Expect breakage... One thing you can rely on is breakage. Where your natural hair meets your relaxed hair is very weakened. Your hair is  prone to snapping off right on that line. The longer your hair gets and the more you manipulate the hair the more likely it will happen. This is a big reason I don't love the idea of wearing small braids, weaves, or applying heat to your hair daily.
      3. Baby your locks... Take it easy on your hair during this period. The less you mess with it the better off you are. Protective styling is a great option and regular trims every 3-6 months are recommended. Try to avoid hair lightener like getting highlights because the bleach can cause damage to the hair.
      4. Avoid heat... Heat is probably one of the reasons your in need of a hair re-do. If you wear your hair straight sometimes the daily maintenance of your hair can include heat tools. It shocks me how many people do not use heat protectants on their hair. The heat causes breakage and alters your natural hair texture over time.
      5. Embrace protein... 90% of the hairs weight in its dry state is protein called keratin found in the cortex of the hair strand. This keeps the hair resistant against breakage. The chemical process weakens the hair after a relaxer. The relaxed hair will be weaker than your new growth which is what causes it to break off at that point. To strengthen the relaxed hair you need to add protein. Learn more about at home protein treatments HERE and learn more about your hair from the inside out HERE.
      6. Find what works... You will need to go through the trial and error with hair products to find what will work best for you. What works in a YouTube guru's hair may not work for your own. Don't break the bank trying products and more expensive isn't always better. Learn how to make at home hair treatments HERE to replace store bought expensive ones.
      7. Become aware... Read product labels and make online resources available to you. YouTube, beauty forums, Facebook, etc. are all great places to research products. You need to pay attention to the chemicals your putting into your hair. The less ingredients the better. Learn what to avoid and what to look for in the products you spend your money on. Find out why HERE.
      8. Take your time... Your hair while it is transitioning could take up a lot of time to maintain. To make it easier outside of the shower go the extra mile in the shower. Don't wash your hair to often and when you do use a sulfate free shampoo which you can learn more about HERE. Find a good conditioner and over use it. Deep condition often to add moisture to the hair as well.
      9. Co-wash... This has made one of the biggest differences in my hair. Co-washing is using only conditioner to wash your hair. Focus conditioner on the middle of your hair down. By applying it to your scalp your wasting product and your hair could be weighed down making your scalp look greasy.
      10. Moisture... Keep your hair hydrated weekly not daily. Relaxed hair can become water logged and break off if overly moisturized. It can't take as much moisture as your natural hair because of the difference in its porosity. Find out your own hairs porosity HERE.
      11. Section your hair... Before you do anything your hair will need to be in sections. It makes it easier to work with once it starts to become thicker. Applying products to the sections can increase their penetration and efficacy.
      12. Don't panic... Your new curl pattern is probably something you haven't had to deal with in a long time. You will not know your true curl pattern until you have cut off all of the relaxer and your hair is at least 3 inches long. The relaxed hair can add weight and pull out some of the curl causing a looser curl pattern. You need to give your hair some time and most importantly when you do see your true curl pattern you need to accept it and realize beauty comes in all different shapes.
      13. Try twist outs & braid outs... There's so many different ways to do these. They can be very time consuming but once you get the hang of it the results are worth it. One tip is to start off with damp hair and to mix a braid out with a twist out. 2 strand/flat twist the natural part of your hair and then cornrow or braid the relaxed portion of your hair. Use a flexi rod, straw, or perm rod to assure a curled end. The relaxed hair can be resistant against any texture but straight. 
        KitchenKurls | Transitioning Help | http://hairdr13.blogspot.com
        My first attempt at a twist out
      14. Wrap your hair at night... Lay your edges down and protect the integrity of your hair at night so your morning maintenance is reduced. You will thank yourself later when your styles last longer, you win the battle against frizz, and you have less work to do in the morning.

      Related Blog Post's...

      My Hair Journey
      Transitioning Hair Regimen
      Keeping Hair Healthy